
I love butterflies! I love taking photos of them, attracting them to my yard, and I enjoy collecting and creating them. A couple weeks ago I was at at scrapbook retreat with a group of friends and one of them had a Cricut Cuttlebug Machine. I’ve been wanting to try one out, so I was super excited to have the opportunity to take this one for a test run. I used it to emboss some butterflies and create this fun DIY embossed butterfly framed wall hanging. I’m keeping this one for myself, but it would make a great DIY gift idea for Mother’s Day, a birthday, or even a beloved teacher who loves nature.

I want to share how I made my DIY embossed butterfly wall hanging so you can recreate it for yourself if you’d like to.
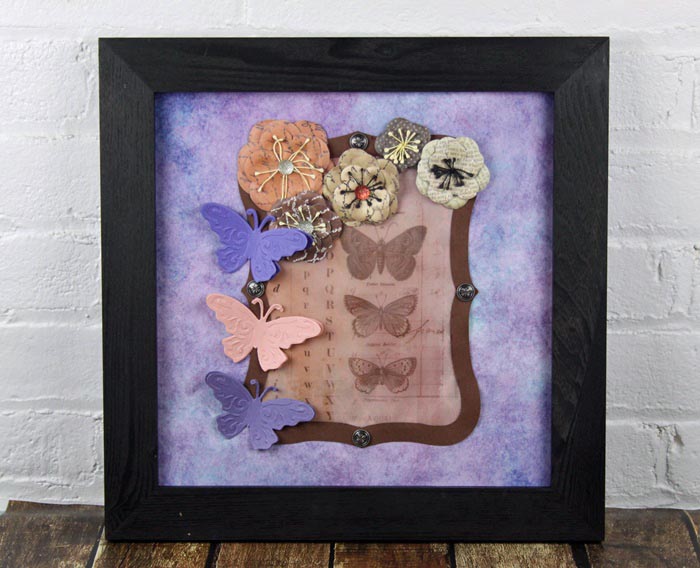
DIY Embossed Butterfly Framed Wall Hanging
Materials:
We recommend products we use and love, so we link to those we think you may like. Some links may be sponsored.
- Cricut Cuttlebug Machine
- Cuttlebug 12-Inch Embossing Border, Butterfly
- I used a page from the Advantus Idea-Ology Vellum Paper Stash for the butterfly paper
- Paper Scrapbook Flowers
- 12 x 12 purple marble scrapbook paper
- purple and 2 shades of peach card stock for the butterflies
- brown cardstock for the paper frame
- 12 x 12 piece of cardboard
- 12×12 Scrapbook Frame
- E-Z Runner Permanent Tape
- Antique Scrapbook Brads
- Cricut Cutting Machine
- Cricut Cartridge Accent Essentials
Instructions:
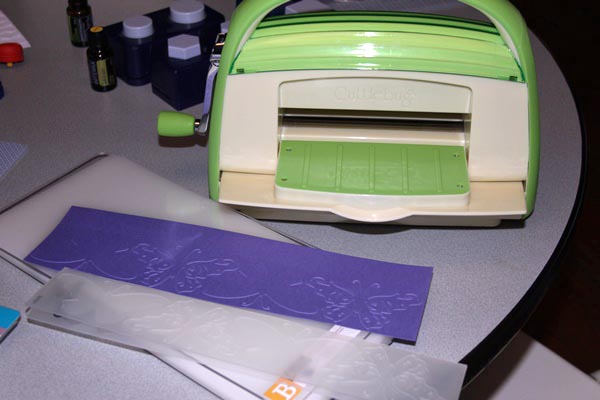
1. I used the Cuttlebug with the butterfly border embossing folder to create the butterflies. I used a purple card stock, and 2 different shades of peach card stock and embossed one set of butterflies onto each. It was super easy and fun to run the folder through the Cuttlebug. Now I’m going to have to buy a Cuttlebug for myself, so many possibilities!
2. I cut out one solid and one imprinted butterfly from each color. It took a little time to cut carefully around each butterfly with a small pair of scrapbook scissors.
3. I cut down the butterfly vellum paper to 6 inches by 9 inches using a straight edge cutter.
4. I used the Accent Essentials cartridge to cut out a 6 inch by 9 inch frame from brown scrapbook paper. I set the frame to cut at 6 inches on my Cricut Machine.
5. Stick the vellum paper to the frame using a glue pen or double sided permanent tape.
6. Stick the vellum paper frame to a larger 12 x 12 sheet of purple marbled scrapbook paper.
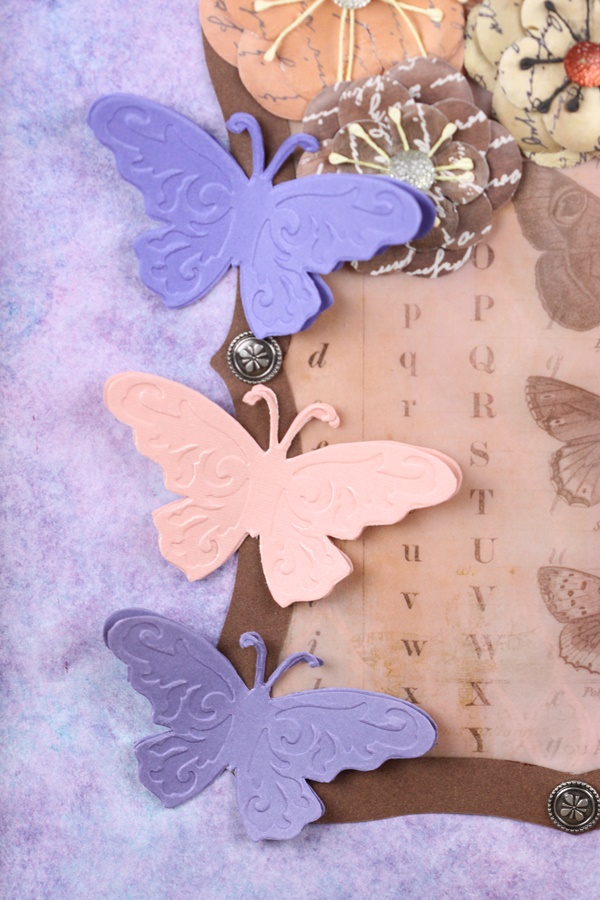
7. Insert antique brads into the center of each side of the paper frame, and fold the ends back so they will stay in place. You may need to use a punch to poke a small hole through the paper before you insert the brads.
8. Add antique looking paper flowers to the top left corner and across the top of the paper frame.
9. Glue the butterflies down the left side of the frame using a glue pen or double sided permanent tape. Use the plain embossed butterfly as the base, and just glue the center of the imprinted butterfly over the top of it so you can bend the wings a little and make the butterflies look 3-D.
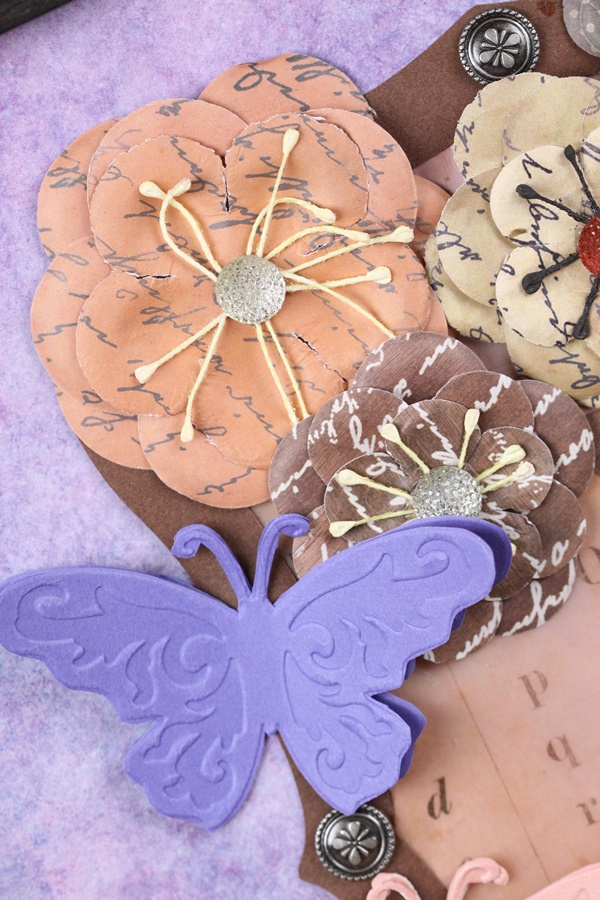
Repeat the process until you have all 3 butterflies glued to the left side of the paper frame.
10. Use permanent tape to stick the whole thing to a sheet of 12 x 12 inch cardboard.
11. Insert the wall hanging into a 12 x 12 inch frame and hang it on the wall or give it as a gift.
For more easy gift ideas, visit a few of my favorite bloggers:
- DIY Lavender Facial by Confessions of an Overworked Mom
- Easy Cookie Platter Mother’s Day Gift by A Mom’s Take
- DIY Mother’s Day Herb Garden Gift by Mom Does It All
- DIY Vanity Tray by Style on Main
- Homemade Painted Glass Bottle by Our Family World
- Thanks a Latte Teacher Gift by Simply Southern Mom
- DIY Shea Butter Lotion Bars by Better in Bulk
- DIY Mother’s Day Coupon Book for Twin Moms by Mom on the Side
- Party Worthy Spinach Salad with Strawberries by Day by Day in Our World
- DIY Aromatherapy Shower Fizzies by My So Called Balanced Life
- Easy DIY Photo Coasters & a Delicious Mocktail to Spoil Mom by Two Boys One Girl One Crazy Mom
- Add Some Style to Your Sunglasses by Greta’s Day
- DIY Kitchen Herb Garden Gift by About a Mom
- Pasta Picture Frame by Upstate Ramblings
- Easy Marquee Letter Craft by Momma D Jane’s Blog
- School’s Out for Summer Gift by The Guavalicious Life
So pretty! I love the flowers with the words on them.
That’s absolutely gorgeous. I’ve never heard of a Cuttlebug before but I need one now!
What a neat idea. I love butterflies too and I can’t wait to make this DIY
That is such a cute idea! I love to make pictures like that. Nothing like a personal mother’s day gift!
That is so cute. My daughter would love to have one of these for her bedroom! So pretty!
Wow that turned out beautiful! I love making paper crafts they are so fun and versatile.